
 русский
 Français
 Español
 Deutsch
 عربى

How to cut men's hair with clippers: Practical Applications, Selection, Performance
On a typical Saturday morning, the mirror reveals the truth: the hairline has grown shaggy, the sides are sticking out past the ears, and another barber visit is sitting on the calendar. A single men's haircut at a barbershop can cost anywhere from twenty to fifty dollars depending on the city and the shop, which adds up to roughly two hundred and fifty to six hundred dollars a year for a monthly cut. A clipper, once purchased, costs almost nothing per use. That simple arithmetic has driven more and more men and parents to learn how to cut men's hair with clippers at home, and the skill is far more accessible than most people assume.
The reason most at-home clipper cuts fail is not a lack of talent. It is a lack of structure. When you understand how guard sizes relate to blade length, how the taper lever refines the cut, and where to stop the clipper along the curve of the head, a clean haircut becomes a repeatable process rather than a gamble. This guide lays out that process from start to finish, including the tools you need, the exact guard numbers for each section, how to blend the transition from short to long, and how to avoid the most common mistakes beginners make.
The pace of the cut matters more than the speed. Every professional barber works in a logical order: the back and sides first, the crown and top second, and the edge detailing last. You will use that same order, and by the time the edges are finished, the haircut will look like it came from someone who does this every day. Even if this is your first pair of clippers, you can produce a presentable, comfortable haircut in about thirty minutes once you know the method.
What You Need Before You Make the First Cut
Cutting men's hair with clippers does not require a drawer full of professional equipment, but it does require a few specific tools. The minimum list is a working clipper, a full set of attachment guards, a comb, a pair of scissors, clipper oil, a cleaning brush, and a good mirror setup. A cape or a large towel keeps hair off the neck and floor, and a spray bottle with water is useful but not essential for most clipper cuts.
The clipper itself is the heart of the operation. Look for a model with sharp blades that run cool, a motor that does not slow down noticeably in thick hair, and guards that click firmly into place. A clipper that pulls or snags hair makes every other part of the process miserable, so this is not the place to save five dollars on a no-name tool. Cordless clippers are convenient because there is no cable to work around, but a corded clipper never dies mid-cut. For home use, a cordless model with at least sixty minutes of runtime is a solid balance, especially if you are cutting more than one head of hair in a single session.
Blade material is worth considering before you buy. Standard steel blades are durable, hold an edge well, and are relatively easy to sharpen or replace. Ceramic blades run cooler because they absorb less heat from friction, but they are more brittle and can chip if dropped onto a hard floor. For a family that will use the clipper regularly, steel is the practical choice; for someone with heavy, coarse hair who wants less blade heat, ceramic is worth the extra care.
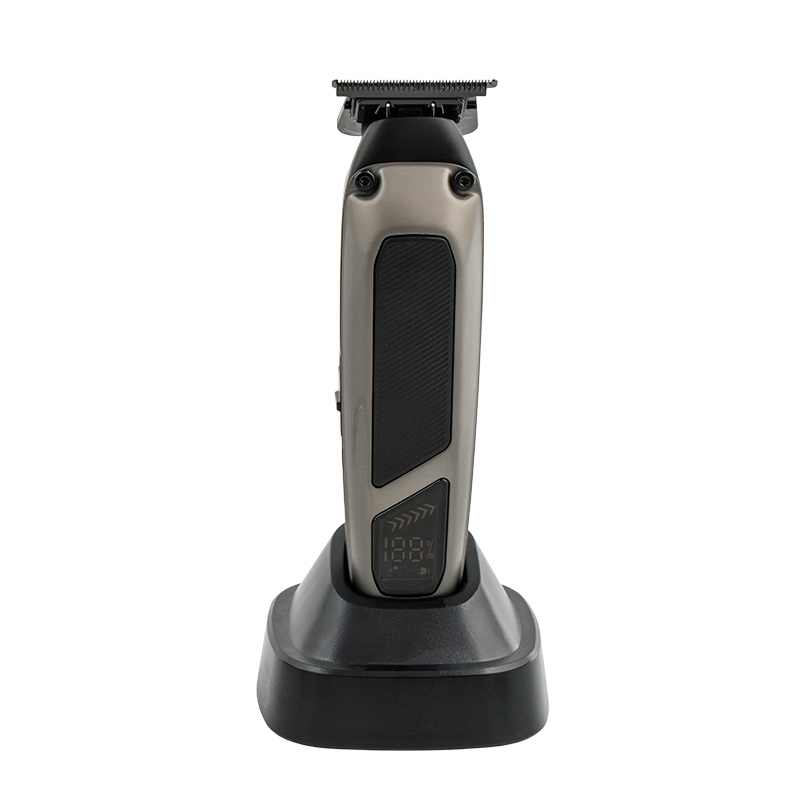
 LT-1217 Efficient Quiet Electric Hair Clippers for Home and SalonThis model features interchangeable steel or ceramic blades, low noise, and wet/dry use. It is a practical choice for regular family grooming, as highlighted by the blade material discussion.View Product →
Guards and combs are not all the same, either. Most clipper kits include a plastic set of guards numbered from 1 to 8, and these numbers are what this guide uses throughout. Some brands also offer metal guards, which are sturdier but can be hotter against the scalp after extended use. Regardless of the material, check that each guard slides on and clicks into place cleanly. A loose guard can lift during a cut and leave a bald strip where it should not be.
Clipper Guard Numbers Explained
Every beginner asks the same question: what does "a number 2" or "a number 4" actually mean? In simple terms, the guard number refers to a plastic or metal comb attachment that sits between the blade and the skin. The higher the number, the more hair is left on the head. The numbers correspond to standard lengths in both millimeters and inches, and once you internalize them, you can walk into any haircut conversation and know immediately how short the result will be.
Most clipper manufacturers follow a consistent scale, but there is some variation between brands and even between product lines. The table below gives the standard reference for what each guard number produces on a typical clipper. If your clipper kit prints a millimeter value directly on each guard, trust that printed number over any general chart, because it is the actual length that your blades will leave.
| Guard number | Approximate length | Typical use |
|---|---|---|
| No guard (0) | 0.5 - 1 mm (1/32" - 1/16") | Skin fades, precise outlines, bald sections |
| 1 | 3 mm (1/8") | Very short buzz, bottom of a fade, clean taper |
| 2 | 6 mm (1/4") | Short back and sides, mid-fade, summer cut |
| 3 | 10 mm (3/8") | Medium-short sides, crew cut, uniform buzz |
| 4 | 13 mm (1/2") | Longer sides, beginning of a classic taper |
| 5 | 16 mm (5/8") | Longer crop, blending the sides into the top |
| 6 | 19 mm (3/4") | Long top sections, softer blends |
| 7 | 22 mm (7/8") | Preserving length on top for shorter styles |
| 8 | 25 mm (1") | Leaving maximum length, trimming only the ends |
As a general rule, start with a guard one or two numbers longer than you think you want. You can always remove more hair, but you cannot put hair back. If you are cutting a child's hair, the same logic applies with even more caution because children move more and tolerate less. Begin with a number 4 all over, check the result, and only go shorter if the length feels too long.
If your clipper kit came with guide combs that are clearly labeled, it is worth spending thirty seconds to confirm the printed lengths. A 3 and a 4 may look similar on the guard itself, but the difference of 3 to 4 mm is very visible on a head of hair.
The Taper Lever: Your Built-In Fine Adjustment
Every decent clipper has a small lever somewhere on the body, usually along the side near the blade. That lever is called the taper lever, and it changes how far the blade extends past the guard. In the closed position, the blade sits closer to the guard, producing a shorter cut. In the open position, the blade retracts, leaving the hair slightly longer. The effect is a difference of roughly 1 to 2 mm for each guard size, and that small range is exactly what you need to smooth out a harsh line.
Most beginners ignore the taper lever because it seems insignificant, but it is the simplest way to add a professional finish. Imagine you have cut the back and sides with a number 2 guard and you want to taper the very bottom edge so it fades gradually rather than stopping in a hard line. Set the lever closed and make a pass along the bottom half-inch of the neck area, then open the lever halfway and make another pass just above that, and finally open it fully for the third pass. You have just created a three-step fade effect with a single guard.
It also helps to think of the taper lever in relation to the next guard number up. A closed number 2 will often produce a length that falls between a 1 and a 2 guard, which is why barbers describe the lever as a micro-guard. With a number 3 guard open, you can match the length of a long 2, and with a number 3 guard closed, you can approach the length of a short 4. Using these in-between positions is far easier than swapping guards repeatedly mid-cut.
One important detail: the taper lever only works when the guard is attached in the correct orientation. Most guards are designed so the lever is still accessible; if you are struggling to move it, re-check that the guard is not covering the lever slot. On some clippers the lever clicks into set positions, while on others it slides freely; both types work, but a slotted lever gives you finer control for gradual blends.
Preparing the Hair and the Workspace
Preparation is the difference between a calm, clean cut and a stressful, hairy mess. Start with the hair itself. Ideally, it should be clean and completely dry before you attach any guard. Clean hair is easier to comb and inspect, and dry hair cuts more predictably with a clipper than wet or damp hair, which tends to clump and tug. If the person has just washed the hair, wait until it is fully dry, or you risk an uneven result and possible pulling from the blades.
Work in a room with bright, even lighting. Natural daylight is ideal because it shows every small variation in length and every missed spot. If you are cutting at night or in a dim bathroom, arrange an extra lamp so you can see the contrast between sections of hair. Dark hair shows lighter patches more clearly, while light, fine hair requires even harder light to spot uneven areas.
The floor should be prepared before a single hair falls. A hard floor is easiest to clean; if the cutting is happening over carpet, lay down an old sheet or a plastic tablecloth that can be gathered and dumped afterward. Drape a cape, towel, or another sheet around the person's shoulders and tuck it firmly so hair does not slide down the neck. Put a comb, the clipper, scissors, and spray bottle within reach before starting, so you are not hunting for tools while a half-cut head sits in front of you.
If you are cutting someone else's hair, ask them to sit in a straight-backed chair at a height where you can see the top of the head without bending too far. If you are cutting your own hair, you will need a fixed mirror in front and a handheld mirror to view the back. Many self-cuts fail not because of the clipper work but because the cutter could not see the angles behind the head. Solve that problem before turning the clipper on.
Step-by-Step: Cutting the Back and Sides
Every structured clipper cut begins with the back and sides. These areas carry the shortest lengths in most men's haircuts, and building them first gives you a clear canvas for the longer top. Choose your starting guard based on the style: a number 2 or 3 for a short back and sides, or a number 4 if you want a more conservative result. When in doubt, start longer.
Comb the hair down from the crown so it falls in its natural direction. On the back and sides of most men's heads, hair grows downward and slightly outward, so the clipper should move upward against the direction of growth to get the cleanest, shortest result. Place the clipper flat against the skin near the bottom of the neck, with the blade teeth pointing up, and glide it upward in a straight, steady stroke. Do not press hard; the weight of the clipper is enough, and pressing only creates irritation and uneven lines.
Work in a systematic pattern rather than jumping randomly around the head. A good sequence is to do the lower back of the neck first, then moving up the left side to the temple, then the right side to the temple. Each stroke should overlap the previous one by about half the width of the clipper blade. This overlapping prevents the clipper from leaving narrow strips of uncut hair, which are the main cause of that striped look after a home cut.
As you move upward, you will reach a point where the flat plane of the side of the head begins to curve toward the top. That curve, often called the ridge or the parietal ridge, determines where the longer top hair should be protected. When the clipper reaches this ridge, do not push it over and across the top. Pull the clipper outward and away from the head in a slight scooping motion, so the blades lift off the scalp near the curve. This leaves the top hair long while keeping the sides clean, and it removes the risk of accidentally cutting a chunk out of the crown.
Continue around the head in this way. When the back and sides have been covered once, run your non-clipper hand through the hair to feel for any longer patches you missed. Uneven areas often hide behind the ears and at the nape of the neck, so give those spots an extra pass with the same guard.
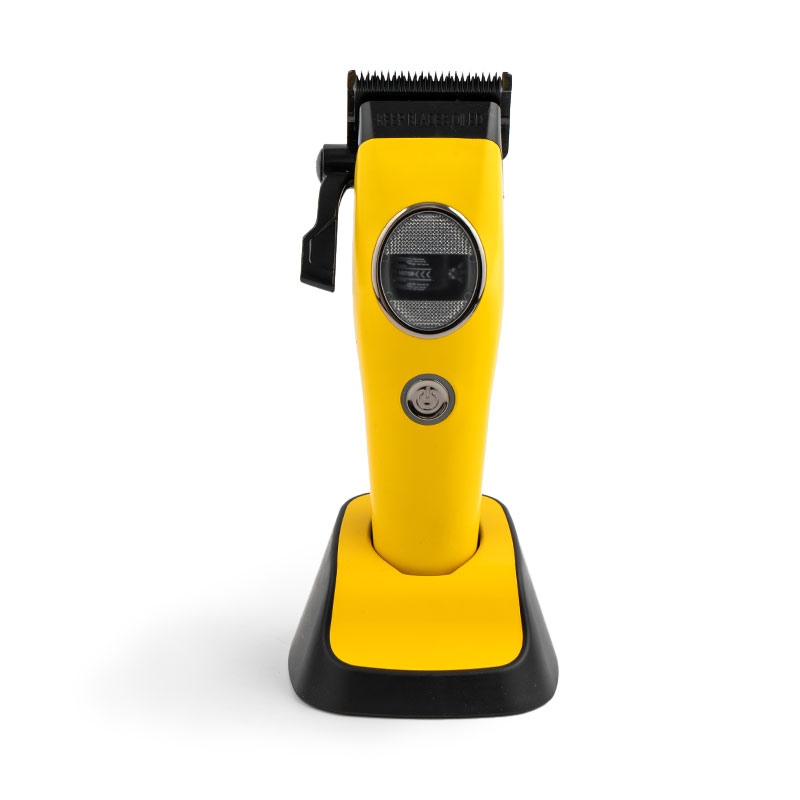
 LT-761 Professional Home Hair Clippers with Magnetic Levitation MotorEquipped with a magnetic levitation motor and DLC-coated cutter, this clipper offers stable power and sharp performance, making it a strong option for handling thick hair that needs multiple passes.View Product →
For men with very thick or coarse hair, a single pass may not be enough to bring the sides down to the intended length. That is normal. Make a second pass against the grain, and add a third for areas that still feel dense. The clipper motor should handle the work without stalling; if it slows down dramatically, you are better off using a slightly longer guard and accepting a less aggressive cut than trying to force it.
Creating and Blending the Transition
The transition line, where the shorter sides meet the longer top, is the section that separates an obvious home haircut from a genuinely neat one. If you are using a single guard all over, there is no transition to worry about, but most classic men's haircuts require a graduated blend. The simplest way to blend is to step up through guard sizes as you move upward. For example, cut the bottom inch of the neck with a number 1, the middle section of the back and sides with a number 2, and the area just under the ridge with a number 3. Each step leaves slightly more length, and when viewed from a few feet away, the combination reads as a smooth gradient.
The taper lever works beautifully here as well. Instead of switching guards repeatedly, you can keep a single guard of a mid-range size and adjust the lever between closed, half-open, and fully open positions as you work your way up the head. A closed lever on a number 2 gives a tight cut near the ears, while opening the lever progressively toward the ridge creates a soft transition without a visible seam. This is the technique most barbers use to fade a haircut, and it is surprisingly forgiving for a beginner.
For an even smoother blend, use the clipper-over-comb method. Hold a comb against the head so its teeth point outward, sliding it upward along the transition area. The hair that lifts above the comb is exactly what the clipper should remove. Run the clipper across the top of the comb teeth, and the combination of comb height and blade position gives you precise control. This method takes a little coordination, but it is the most versatile way to blend because it does not depend on guard numbers at all.
Men with dense, stubborn hair often need a few extra rounds of blending because thick hair holds onto visible lines more readily than thin hair. Cross-cutting, which means passing the clipper diagonally across the transition from above and below, breaks up those lines better than simple straight passes. After cross-cutting, check the blend by holding the hair up with your fingers and looking at the point where the lengths meet.
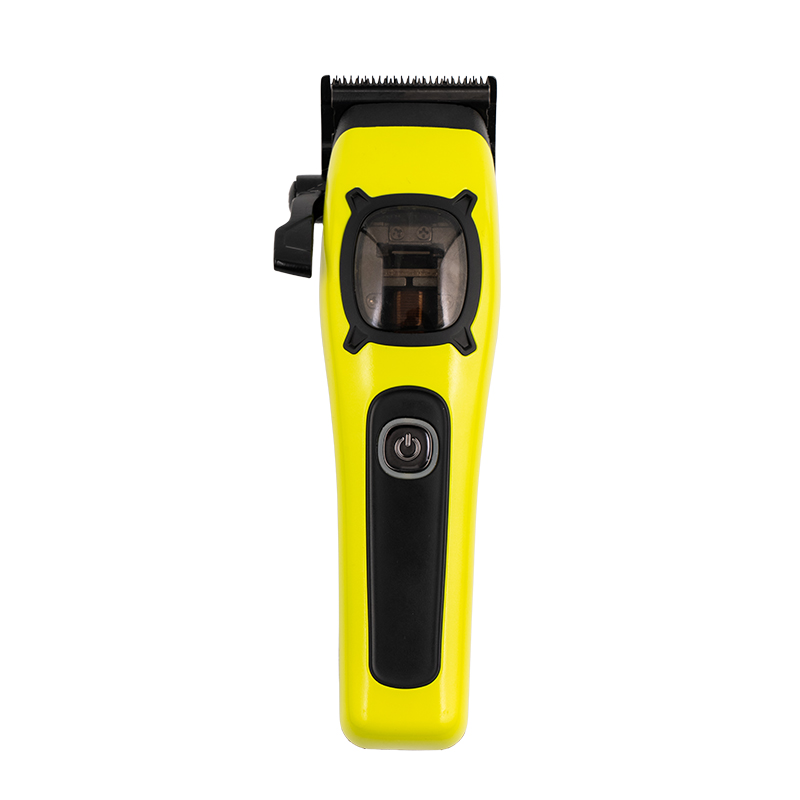
 LT-714A Powerful Outer Rotor Motor Hair Clippers for Thick HairWith a high-torque outer rotor motor and DLC-coated blades, this model is built for dense, stubborn hair, supporting the cross-cutting and blending techniques described in the surrounding grooming guide.View Product →
When a blend resists every technique, the most reliable fallback is to shorten the top slightly. Use a number 5 or a number 6 on the top instead of leaving it very long. A shorter top has less visual contrast with the sides, so the transition looks intentional even if it is not perfectly graduated. This does not mean the cut is a failure; several popular men's hairstyles pair a medium top with clean sides and look better for it.
Cutting the Top with Clippers
Once the sides and back are blended, the top receives its length. The top of a men's head usually wants to be left longer than the sides, so you will switch to a larger guard or use clipper-over-comb. A common starting point is a number 5 or 6 guard, which preserves roughly 16 to 19 mm of hair. Move the clipper from the front hairline toward the crown, following the natural direction of hair growth. Just as with the sides, overlap each stroke by half to avoid leaving lines.
The crown area requires special care. Hair at the crown grows in a circular pattern, and cutting against it can create a noticeable bald dot, sometimes called a cowlick cut. Move the clipper gently in the direction the crown hair naturally swirls, and do not press the blade flat into that area. If the crown hair is long and thick, use clipper-over-comb there instead of a guard, because the comb lets you control exactly how much hair remains at the crown's peak.
If the person wants a uniform buzz cut, skipping the top section entirely is fine: just run one guard over the whole head from front to back, and make a second pass against the grain for an even result. But if you are building a classic short back and sides, the top needs its own pass with a longer guard. Work in sections: part the top hair if necessary, comb each section upward, and clip the ends that stick above the comb. Repeat from the forehead to the crown until the entire top matches.
Check the top length regularly by letting the hair lie naturally and running your fingers through it. Hair settles differently when wet than when dry, so judge the length while it is dry. If the front is longer than the back, fix it by trimming the front hairline with scissors rather than another clipper pass. Scissors give you a cleaner edge along the forehead and an easier way to cut small amounts at a time.
Finishing the Edges: Neckline, Sideburns, and Ears
The final detail pass makes the haircut look deliberate. Start with the neckline. Ask the person to tilt the head forward slightly, then locate the natural crease where the back of the head meets the neck. The hairline should follow an outline that is either squared at the corners or softly rounded, depending on preference and face shape. A square neckline is defined with straight lines and looks more commercial; a rounded neckline is more classic and forgiving to execute. Using the clipper with no guard, or a detail trimmer if you have one, follow the crease from one side of the neck to the other.
When outlining the neck, keep the clipper blade perpendicular to the skin and move slowly. A common mistake is to curve the line too high, which makes the nape look shaved even when it is not. If that happens, lower the outline on the next pass. The line should sit low enough that it disappears when the person looks straight ahead, and it must be symmetrical from the center of the neck outward.
Sideburns are next. Men's sideburns generally end between the top of the ear and the middle of the ear, but the right length depends on the face. A shorter sideburn widens the face slightly, while a longer sideburn narrows it. Mark both sideburns with a comb or your finger before cutting so they match. Then angle the clipper or trimmer from the sideburn down toward the ear in a straight line, tapering the thickness slightly so the sideburn blends into the ear area without a clunky block.
Around the ears, hair often grows in small whorls that the main passes missed. With no guard attached, run the clipper blade flat just above the ear and along the hairline in front of it. This removes the tiny sticking-out hairs that make a haircut look unkempt. If hair is growing tightly against the ear itself, use the very edge of the blade or a detail trimmer to follow the ear's contour. Be patient here, since the skin is thin and any pressing motion can cause irritation or a nick.
Finally, check the area between the eyebrows and the upper edge of the sideburns, sometimes called the temples, and blend any remaining hardness there with a light clipper pass. The temples are often one of the last visibly uneven spots on a home haircut, and a few seconds of attention makes the whole head look sharper.
Four Easy Haircut Recipes You Can Follow
A recipe-style approach works well when you want a consistent result without calculating every guard change. Four basic styles cover the vast majority of home cutting needs: the even buzz, the short back and sides, the crew cut, and the simple low taper. Each recipe lists a guard sequence and the order of operations, so you can replicate it every time without having to think.
- Even buzz: Choose a single guard between a 3 and a 6. Run the clipper over the whole head in upward strokes, then do a second pass against the grain for uniform length. No blending, no taper, finished in ten minutes.
- Short back and sides: Use a 2 or 3 guard on the back and sides, with a 5 or 6 guard on the top. Blend the transition with the taper lever or a 4 guard. This is the classic low-maintenance men's cut that works for most face shapes.
- Crew cut: Trim the top with a 4 guard, the sides with a 2 guard, and open the taper lever on the sides near the ridge to soften the transition. The result is a neat, military-inspired shape that stays presentable for three to four weeks.
- Simple low taper: Start with a 1 guard closed at the very bottom of the back and sides, open the lever for the next inch, then step up through 2 and 3 guards toward the ridge. Keep the top with a 6 guard. The effect is a modern faded look without the complexity of a full skin fade.
If the recipient is a child, or if you are cutting hair for the first time, the even buzz is the safest place to start. Its uniform length hides most small errors, and it familiarizes you with the clipper's feel before you attempt blending. As your confidence grows, the other recipes become quicker to execute.
Cutting Your Own Hair with Clippers
Cutting your own hair adds two complications: visibility and reversed movements. The back of your head is nearly invisible without mirrors, and every stroke of the clipper feels different when you are doing it on yourself. Still, a tidy self-cut is entirely possible with the right setup. Place a large mirror in front of you and hold a second mirror behind your head at an angle that lets you see the back through the front mirror. This two-mirror arrangement is not optional; without it, you will be working blind in the most visible part of the cut.
Use a longer guard for your first self-cut than you would use on someone else. The lack of direct sight makes mistakes more likely, and starting long gives you room to correct them. A good approach is to use a 4 guard around the sides and back, cut the top to match, and then go around the haircut a second time at the same length to catch any patches. After that, you can gradually lower the guard number on the sides if you want a shorter result.
Reaching the back of your neck is the hardest part. Bring your elbow up and forward so the clipper blade sits flat against the nape, and move it upward in short strokes. Stop frequently to check the back in the handheld mirror. Hair grows at slightly different angles on the left and right sides of the crown, so compare both sides before deciding the cut is done.
When the clipper work finishes, swap to scissors for the front hairline. Cutting your own front hairline with clippers is risky because a wrong angle removes a visible strip; scissors let you trim tiny amounts with far more control. Comb the hair forward and snip the ends that cross the forehead, always cutting upward into the hair rather than straight across.
If you plan to cut your own hair regularly, a self-haircut clipper kit that includes multiple guards, a detail trimmer, and a good comb makes the process much easier. A detail trimmer in particular helps with the outline around the ears and neckline, where a full-size clipper is too wide to see clearly while working on yourself.
Wet Hair vs Dry Hair: Which Is Better?
Professional barbers debate this question, but for a home cut done with clippers and guards, the answer is almost always dry hair. Dry hair is firmer and more predictable under the clipper blade, which means each pass removes exactly the length the guard specifies. Wet hair, by contrast, tends to clump together and lie flat against the scalp, so it can becut shorter than intended once it dries and springs back. That is why two people can use the same guard and get visibly different results if one starts with damp hair and the other starts with dry hair.
There are a few exceptions. Very coarse hair that resists a clipper can be softened with light misting, but only if the clipper blades are sharp and the motor is strong. Even then, work in smaller sections and dry the hair with a towel before checking the length. Hair that has just been washed also tends to snag, so a small amount of natural oil on the scalp actually helps the clipper glide.
For a beginner, the practical rule is simple: cut on clean, completely dry hair, and reserve the spray bottle for re-wetting small areas if you plan to go back with scissors. Styling products such as wax, gel, or pomade should be washed out before cutting, since they dull the blade and leave sticky residue attached to the guard. That residue not only affects cutting performance but also makes the clipper harder to clean afterward.
Clipper Maintenance That Keeps Cuts Smooth
A good clipper can last for years, but only if it receives basic attention. After every cut, remove the guard, brush the hair out of the blade teeth, and use the small cleaning brush that comes with the clipper to clear the blade area. Stubborn hair can be lifted with the tapered end of a comb. Do not use water to rinse the blade assembly unless the clipper is explicitly waterproof; most clippers are not, and moisture inside the motor housing causes rust and electrical failure.
Oiling is the single most effective maintenance step. Most clippers come with a small bottle of clipper oil, and two drops at the front edge of the moving blade, applied while the blade is warm, keep the friction low and the cutting sound quiet. Oil after each cut, and let it sit for a few seconds before running the clipper to spread the oil evenly. If the clipper starts feeling hot or pulling at the hair, that is a clear sign that the blades are dry or the guard is not seated correctly.
Blade alignment deserves a check every few months. Turn the clipper on and look at the front edge of the moving blade: it should be positioned slightly behind the stationary blade, and the gap should be even across the entire width. If the blades are misaligned, the clipper will grab and pull even when the blades are sharp. Most clippers allow a small adjustment at the blade screws, so loosen them, center the moving blade, and re-tighten. If the blades are dull to the point that no adjustment fixes the pulling, replace them with new blades made for that model instead of trying to sharpen them by hand, unless you have professional sharpening equipment.
Guards also accumulate oil and hair dust over time. Wash plastic guards occasionally with warm soapy water and dry them completely before snapping them back onto the clipper. Do not boil them or soak them in alcohol for long periods, because that can warp the plastic and change the cutting length.
Common Mistakes and How to Fix Them
Everyone who picks up a clipper makes mistakes at some point, and knowing how to recover is part of the skill. The list below covers the most frequent issues and the fastest ways to address them.
| Mistake | Why it happens | Quick fix |
|---|---|---|
| Cutting shorter than intended | Starting with too small a guard, or pressing the clipper hard against the head | Let the hair grow for a week; for the current cut, keep the surrounding areas longer so the difference is less noticeable |
| Visible lines on the sides | Not overlapping strokes, or skipping the taper lever during the blend | Go over the lines with the next guard up, and use clipper-over-comb to soften the step |
| A flat or balding spot at the crown | Pushing the clipper straight over the ridge instead of lifting away at the curve | Trim the surrounding top hair that the same length; it often hides the spot until regrowth |
| Uneven sideburns | Cutting each side without first marking the intended height | Measure with a comb from the bottom of an ear; then square up or round the longer sideburn |
| Clipper pulls or snags hair | Dull or dry blades, or a loose guard | Oil the blades, check the guard fit, and replace the blade if it still catches |
| Hair looks choppy on the top | Cutting the top in random directions, or using a guard that is too short for the desired length | Comb the top straight up, cut with clipper-over-comb, and finish with scissors for the hairline |
Two additional mistakes are worth mentioning because they cause frustration disproportionate to their size. The first is cutting against the grain everywhere without realizing that the direction changes across the head. The hair above the ears grows downward and outward, while the crown hair spirals; following the natural direction avoids patches. The second is spending too long on a single area, which removes more hair than expected and produces a hollow spot. Keep each pass quick and even, and check the overall shape frequently rather than perfecting one zone first.
The Bottom Line
Cutting men's hair with clippers is a practical skill that pays for itself quickly, and it does not require weeks of practice to reach a presentable level. The essentials are simple: start with clean, dry hair, begin with longer guards and shorten gradually, overlap every stroke, lift the clipper away at the curve of the skull, and use the taper lever to soften the transition. A good clipper with sharp blades, clean guards, and regular oiling does most of the work, and the technique carries over whether you are cutting a child's hair, a friend's hair, or your own.
The first attempts may not look like a magazine cover, but they will look like a real haircut, and the next attempt will be better. Keep the recipes from this guide stored somewhere visible, start conservative, and remember that almost every mistake is either fixable on the spot or grown out within two weeks. Very quickly, the clipper will become a normal part of the household routine, and the barber appointment will shift from a monthly necessity to an occasional treat.
+86-574-62151741
+86-13655842900
laituo@google.com
No. 22 Liufang Road, Yuyao Industrial Park, Ningbo City, China
Copyright © Yuyao Laituo Electric Appliance Co., Ltd. All Rights Reserved
OEM/ODM Hair Removal Tool Epilator Manufacturers
