
 русский
 Français
 Español
 Deutsch
 عربى

How to Sanitize Hair Clippers: A Complete Step-by-Step Guide for Home and Pro Use
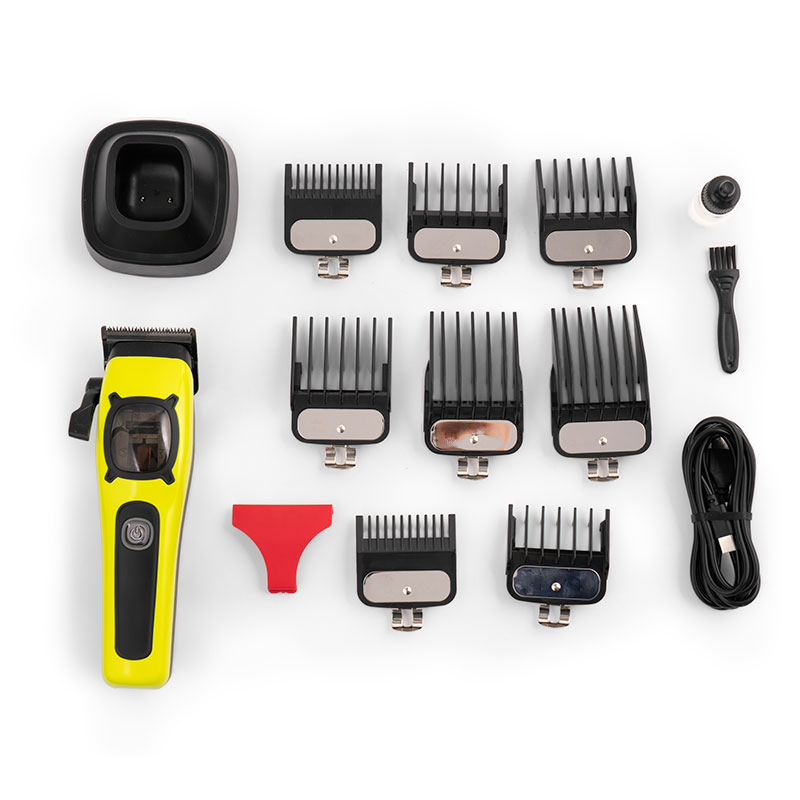
On any given Sunday night, in homes across the world, the same scene plays out. The haircut is finished, the clipper is warm from use, and hair has worked itself into every gap between the blades. For many home users, the cleanup ends with tapping the clipper on the edge of the sink and putting it back in the drawer. That routine is a risk to both the tool and the people who use it. Clipper blades come into contact with scalps, foreheads, ears, and necklines. They pick up oils, dead skin cells, dried sweat, styling products, and sometimes microscopic blood from nicks and razor burn. When the same clipper is used on multiple family members, that residue becomes a transfer mechanism for bacteria and fungi. Sanitizing hair clippers is not a cosmetic habit. It is a maintenance task that protects health, preserves the cutting edge, and saves money over the life of the tool. This guide covers everything needed to do it properly, including the right supplies, the correct disinfectants, step-by-step procedures, cleaning frequency, and the most common mistakes to avoid.
Why Sanitizing Hair Clippers Matters More Than You Think
The skin on the scalp and along the hairline is not sterile. It hosts a natural population of bacteria, and some of those bacteria, such as Staphylococcus aureus, can cause infections if they enter through a break in the skin. Clipper blades, no matter how sharp, create micro-abrasions during a cut, especially on sensitive skin or when the blade is slightly dull. If the blade then comes into contact with broken skin, or if debris left on the blade is driven into the follicle, the result can be folliculitis, which appears as small red bumps or pustules around hair follicles. Fungal infections such as ringworm, medically known as tinea capitis, are also easily spread through contaminated clipper blades. In a family setting, a child with an undiagnosed fungal scalp infection can pass it to a sibling simply by using the same clipper. These risks are not theoretical; professional barbering regulations exist largely because of them.
The skin barrier is the first line of defense against infection, and clippers compromise it in ways that are invisible to the eye. Even a clean-looking blade generates friction against the scalp. When the blade is contaminated, every small cut or scrape becomes a gateway for the organisms that naturally live on the surface. People with eczema, psoriasis, or even mild dandruff have more broken skin and more irritation, which makes blade hygiene even more critical. A clipper shared between people with different skin conditions should be treated with the same caution as a shared toothbrush or a shared razor. This is particularly relevant in households with children, whose scalps are thinner and more prone to irritation, and in households where an elderly member may have a weakened immune response.
Beyond health, a dirty clipper simply performs worse. Hair oil, natural sebum, skin flakes, and styling product accumulate on the blade surfaces and between the teeth. This residue creates friction that the motor has to overcome. The clipper runs hotter, the blade begins to pull and snag, and the cut quality drops noticeably. The cutting edges are precision-ground to meet at a specific angle, and a layer of waxy residue disrupts that geometry. A clean clipper feels sharper than a dirty one even when the blades are physically identical. The difference is measurable both in cutting speed and in the smoothness of the finish on the scalp.
Moisture is also the enemy of steel. When hair and debris sit on a blade, they trap moisture against the metal, and that moisture causes corrosion. Rust pits the cutting edge, and once the edge is pitted, no amount of sharpening will restore it fully. The motor and drive components can also take in debris if the clipper is never cleaned, and hair that wraps around the drive assembly can eventually cause mechanical failure. For clippers that cost anywhere from fifteen to several hundred dollars, regular sanitizing is the most cost-effective way to extend service life. A clipper that is cleaned after each use and deep-cleaned monthly will routinely outlast one that is never maintained.
What You Need Before You Start Sanitizing
Sanitizing a clipper does not require a cabinet full of specialized chemicals. The supplies below cover routine cleaning, disinfection, and lubrication, and most of them are inexpensive and widely available. It is worth assembling a small hygiene kit so the cleaning routine is never delayed by a missing item. Keep the kit in a sealable box or pouch near where the clipper is stored, and resupply it whenever the alcohol bottle runs low or the brush wears out.
| Supply | Purpose |
|---|---|
| Cleaning brush (stiff, narrow) | Removes loose hair and debris from between the blades |
| 70% isopropyl alcohol | Disinfects blades and guards after debris removal |
| Clipper blade wash (solvent) | Dissolves oil, wax, and stubborn residue before disinfection |
| Microfiber or lint-free cloth | Dries blades and wipes the housing |
| Clipper oil | Rebuilds the protective lubrication removed by solvents and alcohol |
| Small Phillips screwdriver | Removes the blade assembly for deep cleaning |
| Shallow dish (glass or metal) | Holds alcohol or blade wash for dipping the blade |
| Cotton swabs | Cleans tight spaces around the pivot, screws, and blade teeth |
Some additional items are optional. A can of compressed air or a small handheld vacuum can help remove hair from the drive area. Disinfectant wipes formulated for electronics are convenient for the clipper housing between deep cleans. If the clipper is used professionally, a hospital-grade disinfectant solution for salon implements may be required by local health regulations, and a timer is useful for tracking the required contact time. Disposable gloves are worth keeping on hand for cases where visible blood residue is present.
How Often Should You Sanitize Your Clippers?
The correct cleaning frequency depends entirely on how the clipper is used. A clipper that runs for six hours a day in a barbershop has a very different maintenance schedule from a clipper doing a ten-minute trim once a month. The table below lays out realistic frequencies for the most common usage patterns, keeping in mind that brushing after every use is the minimum baseline in all cases.
| Usage pattern | After each use | Sanitizing / disinfection | Deep cleaning |
|---|---|---|---|
| Professional barber, multiple clients per day | Brush and wipe after every client | Disinfect blades after every client | Daily |
| Home user, weekly haircut (one to three heads) | Brush out hair after every cut | Disinfect after every cut | Monthly |
| Home user, trim every two to four weeks | Brush after every cut | Disinfect after every cut | Every three months |
| Occasional touch-up (once a month or less) | Brush after every use | Disinfect after every use | Every three to six months |
The key principle is that every use ends with brushing, and every cut ends with disinfection. The alcohol removes the invisible biological residue that brushing cannot remove, including bacteria and fungi that persist on the metal surface. Deep cleaning, which involves taking the blade assembly off, addresses the hair and grit that work their way into the drive mechanism. Some users do a light disinfection every time but skip deep cleaning for months on end. That is a mistake, because the parts you cannot see deteriorate at the same rate as the parts you can see. For a typical home setup with one or two users, a schedule that includes monthly deep cleaning is realistic and adequate. Professionals who work on multiple heads per day should consider a stricter schedule, and many local licensing boards in the barbering industry set their own minimum requirements for disinfection frequency.
Step-by-Step: How to Sanitize Hair Clippers
The following procedure works for the vast majority of corded and cordless clippers. Always check the user manual first because some models have specific instructions, but the general sequence of dry cleaning, disinfection, drying, and oiling applies across the board. Do not rush the process; a thorough job takes ten to fifteen minutes at most.
Step 1: Unplug and set up a workspace
Disconnect the clipper from power before you begin. If it is cordless, remove the battery if the design allows. Place the clipper on a clean, hard surface with good lighting. Lay out the brush, cloth, alcohol dish, blade wash, and oil so you do not have to handle the clipper while reaching for supplies. It is also advisable to put on disposable gloves if the clipper has visible blood residue, which can occur when cutting someone with a nick or razor irritation. A clean workspace prevents the cleaned clipper from coming into contact with new contamination immediately after the job is done.
Step 2: Remove the blade assembly (if detachable)
Many clippers have blades held by one or two screws. Removing the blade assembly exposes the drive arm and the inside of the housing, where hair accumulates. Removing the blade is not strictly necessary for every single cleaning, but it should be done for the weekly or monthly deep clean. On clippers with a fixed blade, skip this step and work carefully around the blade edges with a brush and cotton swabs. If you remove the blades, place the screws in a small container so they do not roll away. Take note of the orientation and alignment marks before the blade comes off, so you know how to reassemble it correctly.
Step 3: Brush away hair and debris
Hold the clipper with the blade teeth pointing downward, and brush from the inside outward so hair falls out rather than deeper into the clipper. Work the brush between the moving and stationary blades, and pay particular attention to the corners and the hinge area. If hair is tightly wrapped around the drive arm or screw posts, gently lift it with tweezers or the tip of a plastic spudger. Do not pull hard, because you can bend the drive components. Compressed air at low pressure can help, but do not aim it directly into the motor intake. The goal is to remove every visible hair before any liquid touches the metal, because liquid mixed with hair creates a paste that is much harder to remove.
Step 4: Clean the blades with a solvent or blade wash
Pour a small amount of clipper blade wash into a shallow dish, just about a quarter-inch deep. Dip the blade assembly into the solution and run the clipper for a few seconds if it is safe to do so with the blade dipped; many professional blade washes are designed for exactly this use. The solvent dissolves the hardened oil and hair product that brushing cannot remove. If the blade is not removable, apply blade wash directly to the blade surface, run the clipper briefly, then wipe with a cloth. Blade wash is a cleaner, not a disinfectant: it removes residue, but it does not reliably kill microorganisms. Treat it as the preamble to actual sanitizing, not as a substitute for alcohol or another registered disinfectant.
Step 5: Disinfect the blades
For the disinfection stage, use 70% isopropyl alcohol or a disinfectant solution specified by the manufacturer. If the blade assembly is removable and the motor does not need to run, submerge the blade in alcohol for at least ten minutes. For fixed-blade clippers that cannot be submerged, saturate a cloth or spray the blade generously with alcohol, work it into the teeth with a soft toothbrush, and allow it to stay wet for several minutes. The contact time matters: alcohol kills most bacteria and fungi only when the surface remains wet for a sustained period. A quick squirt followed by an immediate wipe will remove some germs but not all of them. If you need a higher standard of disinfection, such as when a clipper has come into contact with blood or is used on multiple clients, use a hospital-grade disinfectant registered for salon implements and follow the contact time listed on the label.
Step 6: Dry the blades completely
After disinfection, shake off excess liquid and dry the metal parts with a clean, lint-free cloth. Pay attention to the area between the teeth, where moisture hides. Let the parts sit for a few minutes to confirm they are fully dry. Aluminum blade assemblies dry quickly, but steel blades hold moisture in recesses and behind the fastening posts. Moisture left behind at this stage is a leading cause of rust, especially if the clipper is stored inside a closed drawer or case where air cannot circulate. If you see any discoloration on the blade edges after drying, treat the area with a drop of clipper oil and wipe it off; that is often enough to stop early oxidation.
Step 7: Oil the blades
Alcohol and blade wash both strip the lubricating oil from the blade. A blade that is clean but dry will run hot, drag, and wear quickly. Apply one or two drops of clipper oil to the front edge of the blade where the moving blade slides against the stationary blade, then run the clipper for ten seconds to distribute the oil. Wipe away any excess with a cloth. Too much oil does not help; it simply attracts more hair and dust. The goal is a thin film that protects the mating surfaces without making a mess. Let the oil settle for a minute before the clipper is used or stored. A properly oiled blade is visibly shiny at the contact line but does not drip oil onto the counter.
Step 8: Clean the housing
While the blade is drying or being oiled, wipe down the clipper body. Hair and skin cells accumulate on every surface the clipper touches: the handle, the switch, and the area between the housing halves. Use a disinfectant wipe or a cloth moistened with alcohol, but avoid getting liquid into the charging contacts, the power switch, or any vents. Cotton swabs are useful for the grooves and seams. Dry the housing after wiping so moisture does not seep into the gaps. For cordless clippers, pay extra attention to the charging pins at the bottom, as these can oxidize if repeatedly wetted.
Step 9: Reassemble and test
Once everything is dry and oiled, reattach the blade assembly and tighten the screws evenly. Do not overtighten, because that will distort the blade alignment. Run the clipper for a few seconds to verify that the motor sounds smooth and the blade does not rattle or run hot. Then wipe the blade once more with a clean cloth to remove any oil that worked its way out during the test run. The clipper is now ready to be stored. If the clipper runs louder or hotter than before cleaning, the blade alignment may be off; loosen the screws, adjust the blade position against the alignment marks, and tighten again.
Choosing the Right Disinfectant or Cleaning Agent
Not every liquid that kills germs is appropriate for a hair clipper. Some cleaning products damage metal or plastic, and some disinfection products, particularly those designed for porous surfaces, leave residues that irritate skin. The table below compares the most common options used by professionals and home users, based on their disinfection ability, cleaning ability, and safety for clipper blades.
| Agent | Disinfection ability | Cleaning ability | Safe for blades? | Notes |
|---|---|---|---|---|
| 70% isopropyl alcohol | High | Moderate | Yes, with re-oiling | Best all-around choice for home use |
| 91% or 99% isopropyl alcohol | Moderate to high | Low | Yes, but evaporates fast | Too little contact time for full disinfection |
| Clipper blade wash / solvent | Poor (cleans only) | High | Yes | Use before alcohol, not instead of it |
| Hospital-grade disinfectant | High (label claim) | Moderate | Check label | Required in some professional settings |
| UV sanitizer cabinet | Moderate (surface only) | None | Yes | Does not remove debris; use after cleaning |
70% isopropyl alcohol is the default recommendation for good reason. The 30% water content slows evaporation so the alcohol stays in contact with the blade long enough to denature bacterial proteins and disrupt cell membranes. Higher concentrations evaporate too quickly to reach full disinfecting effect, and they may also dry out plastic parts slightly faster. Spray bottles of 70% alcohol are convenient, as are alcohol-soaked wipes that are safe for metal and plastic.
One crucial caution: alcohol and blade wash both remove oil from the blade. After any treatment with either product, the blade must be re-oiled before the next use. Professionals often keep a bottle of blade wash for a quick mid-day cleaning and end the day with a proper disinfection and re-oiling. In professional settings, check local regulations. Many licensing authorities require the use of a registered disinfectant at a specified dilution for implements that contact skin. In those settings, the clipper blade is treated as a reusable instrument, and the same rules that apply to combs and scissors also apply to clipper blades. A general-purpose surface spray or a kitchen cleaner is not an acceptable substitute.
Deep Cleaning: When Your Clipper Needs More Than a Wipe
Even with a disciplined after-use routine, the inside of a clipper gradually collects hair, lint, and airborne particles. A deep clean every month, or every week in professional use, addresses the parts that routine cleaning misses. It is also the moment when most users spot developing problems, such as a worn drive arm, a bent spring, or corrosion around the mounting posts.
Signs that a deep clean is due
The clipper starts to sound louder or whinier than usual. The motor labors on hair even when the blade is freshly sharpened. Oil seeps out around the housing seams. Hair can be seen packed around the drive arm when the blade is removed. Any of these signs means the internals need attention. Waiting for the clipper to fail completely turns a fifteen-minute maintenance job into a repair bill or a replacement purchase.
Disassembling for deep cleaning
Remove the blade assembly using the screws as described in the step-by-step section. Set the screws aside in a small container so they do not roll away. Look at the drive arm, the cam, and the pocket inside the housing where hair collects. Use tweezers to pull out coiled hair, then use a soft brush and cotton swabs dipped in alcohol to wipe the surfaces. Do not dip the entire motor into any liquid. The motor and the switch gear are electrical components, and a fully submerged motor can fail even after thorough drying.
Cleaning the blade drive and mounting posts
The plastic or metal posts that locate the blade assembly collect a dense ring of hair over time. Scrape them gently with a wooden toothpick or a plastic spudger. Alcohol and a cotton swab remove the remaining residue. If the drive arm has a spring, be careful not to deform it. The spring keeps the moving blade pressed against the stationary blade, and a bent spring ruins the cutting geometry. Also examine the blade alignment slot for cracks; a cracked slot means the blade will shift during cutting and require replacement of the upper or lower blade half.
Cleaning the housing vents
Air intakes and exhaust vents on the housing pull in dust every time the clipper runs. Compressed air in short, low-pressure bursts clears the vent grilles. If you do not have compressed air, a dry toothbrush is enough for most of the dust. Never insert a metal probe into a vent slot, because the motor and bearing surfaces sit directly behind the grille in many designs. A bent bearing or a scratched rotor is an expensive failure. After cleaning the vents, wipe the housing again with a barely damp cloth and dry it fully.
Reassembly after deep cleaning
After all parts have been cleaned, dried, and the blade has been oiled, reattach the blade assembly. Tighten the screws in turn, a little at a time, until the blade sits flush. With ceramic and carbon-steel blades, the alignment marks on the blade and the housing are usually visible; line them up before tightening fully. Run the clipper for twenty seconds to seat the parts, then check for any abnormal heat or noise. A deep-cleaned clipper should run quieter and smoother than before the procedure.
Sanitizing Guards, Combs, and Attachments
The clipper itself gets most of the attention, but the plastic guards and combs also touch the scalp and hair. They do not have moving parts, but they pick up the same oils, dead skin, and hair. They also crack when cleaned incorrectly. A cracked guide comb can scratch the scalp, so inspect each attachment during every cleaning cycle and replace any that show damage.
The safest method for plastic attachments is a soak in warm water mixed with a mild detergent or a few drops of shampoo. Ten minutes in the soapy water is enough to loosen the residue. Then scrub each guard with a small brush, paying particular attention to the rail that slides into the clipper blade, because hair packs into that channel and then pushes the guard off track. Rinse with clean warm water and set the guards on a towel to dry completely. Plastic parts can be disinfected with a wipe or a spray after they are dry. Some users soak attachments in alcohol, but alcohol can make some plastics cloudy or brittle over time, so it is safer to use soap for regular cleaning and a disinfectant spray designed for plastics when disinfection is needed.
Do not put plastic clipper guards in boiling water, the dishwasher, or a microwave sterilizer. High heat warps plastic attachments, and once the guide rail is warped, the guard no longer fits the blade. If a guard gets cracked or the teeth break, replace it immediately, because a damaged guard can catch the skin during a cut. Attachment caps, ear tapers, and blade-sizing combs follow the same rules: wash, dry, and store them with the clipper in a clean, dry place. A simple mesh bag or a small plastic container with a lid keeps the whole set together and prevents dust from settling on freshly cleaned attachments.
Sanitizing for Special Scenarios: Family, Sensitive Skin, and Travel
Different households have different hygiene requirements. A clipper used only on one person with healthy skin still needs regular cleaning, but a clipper used on children, on someone with a dermatological condition, or in a travel environment demands a more careful protocol.
For families with children, treat the clipper as a shared personal hygiene tool. Children have thinner, more reactive skin, and they are more likely to fidget during a cut, raising the chance of nicks. Sanitize the blade between each child, and use a separate set of guide combs for children if you want to avoid any contact with adult styling products. For adults with sensitive skin or a history of folliculitis, skip scented disinfectants and use plain 70% alcohol without added fragrance or moisturizers. Rinse the blade with alcohol once more after the final wipe, then re-oil, so no disinfectant residue is left on the metal when the blade touches the skin.
Travel adds two complications: storage and environmental moisture. A clipper packed into a toiletry bag sits against damp towels and shampoo bottles. Even a clean clipper can be contaminated by condensation inside the bag. After a trip, remove the blade, brush it out, wipe the housing, and leave the clipper open in a dry room for a full day before storing it. When traveling with a clipper, use a rigid case or a padded sleeve that keeps the blade from rubbing against other objects, and pack a small bottle of oil and a folded cloth so you can do a quick maintenance pass before the clipper goes back into the bag.
Sanitizing Mistakes That Ruin Clippers
Part of learning how to sanitize hair clippers is learning what not to do. The most common mistakes come from reasonable assumptions about cleaning, but they cause real damage. Avoiding them is straightforward once you understand the mechanism behind each failure.
| Mistake | What happens | The right approach |
|---|---|---|
| Submerging the whole clipper in water or alcohol | Damages the motor and switch; rust forms inside the housing | Only dip detachable blades; wipe the housing |
| Skipping the brush step before using alcohol | Hair and debris form a barrier that keeps the alcohol away from the metal | Brush thoroughly before any liquid |
| Letting alcohol evaporate without wiping | A residue of dissolved oil and dirt stays on the blade and dries into a film | Wipe the blade while the alcohol is still wet |
| Re-oiling immediately and heavily | Excess oil flings into hair and attracts dust; blade surface becomes sticky | Use one or two drops, run for ten seconds, then wipe |
| Using household cooking oil or multi-purpose lubricant sprays | These oils gum up, change viscosity, and are not designed for skin-contact metal | Use a proper clipper oil or a skin-safe light machine oil |
| Washing the blade in hot water with soap | Rust can start quickly if the blade is not dried absolutely completely | Use solvents or alcohol, and dry immediately |
| Storing the clipper immediately after cleaning, while still damp | Moisture in the blade area causes rust and corrosion | Let all parts air-dry for several minutes before storage |
One additional mistake deserves special mention. Some users clean the blade while it is still attached to a corded clipper and run the clipper while liquid pools around the base of the blade. That sends solvent into the housing and toward the motor, where it can strip the lubrication from internal bearings. Keep liquid on the blade and the front of the clipper only, and clean the base of the housing with a barely damp cloth. Another common error is using a disinfectant wipe on the blade and then never re-oiling it. The alcohol in the wipe removes the blade oil, and an un-oiled blade will drag and wear unevenly on the next cut.
What Professionals Do and What Home Users Should Copy
Licensed barbers work under sanitation rules that are far stricter than anything a home user will need, but those rules are worth copying at a smaller scale. In commercial barbershops, the standard procedure between clients begins with brushing hair out of the blade, spraying the blade with a disinfectant solution registered for salon implements, letting it sit for the contact time stated on the label, and following up with clipper oil before the next cut. At the end of the day, the blades are removed, cleaned with blade wash, disinfected, dried, oiled, and the housing is wiped down. Combs and guards soak in a registered disinfectant solution and air-dry overnight. This process, compressed into the scale of a single household, is exactly what the step-by-step guide above provides.
The important difference between a professional and a home user is not the set of chemicals; it is the consistency. A professional treats sanitation as an uninterruptible routine because regulations and reputation demand it. A home user can adopt the same attitude by tying the cleaning procedure to the act of cutting: every time the clipper comes out of the drawer, it goes back clean. If you cut several people on the same day, disinfect between heads. If you are an occasional self-cutter, disinfect after every use. This consistency prevents problems, and it matters more than the particular brand of disinfectant you choose.
There is also a purchasing side to sanitation. A clipper that is designed for reliable cleaning and disassembly will always be easier to keep sanitized than one where the blade is permanently fixed and the housing has deep seams. When you are choosing tools for home or professional use, consider cleaning convenience as part of the buying criterion. Tools like professional barber clipper sets are built with this maintenance burden in mind, which is why they tend to have removable blades and accessible drive mechanisms. For home users looking to replicate that experience, the same structural features matter. When a clipper is easy to take apart, more users will actually do it.
Choosing a Clipper That Makes Sanitizing Easier
The structure of the clipper has a direct effect on how easy it is to sanitize. A clipper with a detachable blade assembly is dramatically easier to clean because you can work on the blade, the housing, and the drive area separately. A clipper with a sealed, washable blade assembly can be rinsed under running water without destroying the motor, which shortens the disinfection time. A clipper with wider spacing between the blade teeth sheds hair more quickly and resists clogging, which means less time spent brushing out trapped strands.
For a home user who wants the professional-style removable blade layout, the LT761 professional electric hair clippers for home is a good example of the form factor to look for: a standard blade assembly that unscrews in seconds, easy access to the drive arm, and bodywork with no deep crevices for hair to lodge in. That combination keeps the deep-cleaning chore short and reduces the risk of hidden buildup. The same design philosophy applies to many other clippers on the market, and it is the single most useful feature for someone who plans to follow a regular sanitizing schedule.
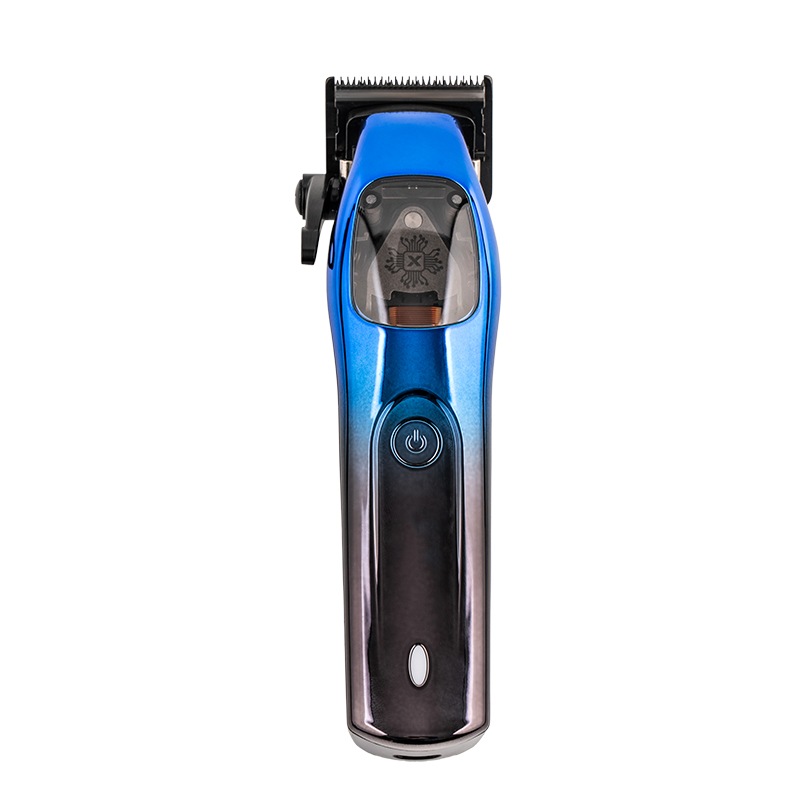
 LT-761 Professional Home Hair Clipper with Detachable Blade AssemblyThis clipper features a standard removable blade assembly that unscrews in seconds, making deep cleaning quick and reducing hidden buildup. Its magnetic levitation motor and DLC-coated blades support efficient, quiet cutting for home use.View Product →
Another design detail that affects the cleaning routine is the motor enclosure. Clippers that seal the motor inside a closed housing block dust from entering the power unit. This is the class of design used in the LT714A powerful outer rotor motor electric hair clippers, where the motor type and housing layout are oriented toward extended service life. A sealed motor unit means the deep-cleaning frequency drops because fewer particles can reach the moving component, and the oiling routine concentrates on the blades instead of worrying about the motor bearings. The practical effect is that users spend less time on internal maintenance and more time on the visible blade and housing surfaces where hygiene actually matters.
 LT-714A Powerful Outer Rotor Motor Hair Clipper with Sealed HousingThe sealed motor enclosure keeps dust out of the power unit, lowering deep-cleaning frequency and simplifying maintenance. Strong torque and DLC-coated blades suit regular salon-style haircuts while supporting extended service life.View Product →
Noise is also a factor in the cleaning routine. A clipper that runs loudly encourages you to cut the cleaning short just to stop the motor noise. Clippers with a quiet drive system, like the LT1217 efficient quiet cutting electric hair clippers, allow you to run the motor for the five to ten seconds needed to distribute oil without feeling like you are annoying the whole household. That small difference makes you more likely to remove the blade, re-oil, and reassemble properly because the tool is pleasant to operate even outside of cutting. When a clipper is noisy, the tendency is to clean it as quickly as possible and store it away, and that haste leads to skipped steps.
 LT-1217 Quiet Cutting Electric Hair Clipper for Wet or Dry UseWith a quiet drive system, this clipper allows easy oil distribution during maintenance without disturbing others. Interchangeable guides and stainless steel or ceramic blades support wet/dry use, making it practical for home and commercial grooming.View Product →
When you evaluate any clipper for sanitization ease, ask three questions before buying. Does the blade come off with normal tools? Are the housing seams wide enough to let hair out? Is the device rated as washable, and does the warranty tolerate washing? The answers determine whether the clipper stays clean in practice or only at the moment of purchase. A clipper that fails these tests may still cut well, but it will demand more effort every time you need to sanitize it, and that effort compounds over years of ownership.
Building a Cleaning Routine That Sticks
A single detailed deep-clean session is worthless if the clipper reverts to the drawer without a routine. The most sustainable approach is to make the cleaning sequence a trigger response: the clipper gets cleaned immediately after it is used, before it is put away. Leave the brush and the oil bottle next to the drawer or in a small hygiene box, so the supplies are within arm's reach at the exact moment they are needed. A three-minute routine of brushing, spraying with alcohol, wiping, and oiling prevents all of the major problems, and the deeper blade-removal cleaning can stay on a scheduled day, such as the first weekend of each month.
It is also useful to track how the clipper performs over time. If a blade starts pulling even after a good clean, the edge may be worn or the blade gap may need adjustment. Some clipper kits, such as self-haircut clipper kits designed for home maintenance, include a spare blade and a sizing tool precisely because routine cleaning alone does not restore a worn edge. Replacing or re-setting the blade is the natural next step after cleaning has failed to restore cutting performance. Over time, every clipper requires consumable parts, and blade replacement is the most common one.
Finally, storage matters. A clean clipper stored in a damp bathroom cabinet is a dirty clipper by the next week. Keep the clipper in a dry, ventilated place. If it lives in a drawer, add a desiccant sachet or a small silica-gel packet near the tool. Avoid storing the clipper directly above a sink where steam from showers condenses on the metal. A sanitized clipper that is stored dry will stay sanitized far longer than one that absorbs ambient moisture after cleaning. Air circulation is the cheapest insurance against rust and corrosion.
Final Thoughts on Sanitizing Hair Clippers
Sanitizing hair clippers is not a complicated task, and it does not require hours of work. The entire routine takes a few minutes per haircut, and the deep clean adds another twenty minutes once a month. The payoff is substantial: cleaner cuts, longer blade life, fewer skin problems from shared tools, and a clipper that keeps the same edge quality for years rather than months. The starting point is recognizing that clipper blades are precision instruments in a small package. They deserve the same respect that you would give to scissors, razors, and combs.
With the supplies listed in this guide, the step-by-step process described above, and a routine that ties cleaning to every use, the clipper will stay sanitary, sharp, and reliable through hundreds of future haircuts. Whether you are trimming one head or maintaining a busy home barbershop, the habit of sanitizing is what separates a tool that lasts from one that quietly degrades in a drawer. Start with a proper cleaning today; the next haircut will feel noticeably smoother, and your skin will thank you.
+86-574-62151741
+86-13655842900
laituo@google.com
No. 22 Liufang Road, Yuyao Industrial Park, Ningbo City, China
Copyright © Yuyao Laituo Electric Appliance Co., Ltd. All Rights Reserved
OEM/ODM Hair Removal Tool Epilator Manufacturers
